“Sometimes I think pushing a repair through a collision center is like putting a bag into the security scanner at the airport,” said John Shoemaker, business development manager for BASF Automotive Refinish Coatings North America. “You put the bag on the belt and hope it comes out the other end without any complications.”
Shoemaker spoke to a group of body shop owners and managers during NACE Automechanika in Atlanta, GA, this past summer about practical production processes and how critical it is to incorporate them into your business.
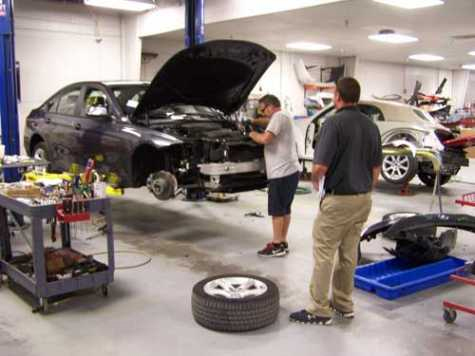
When Shoemaker walks into a body shop, he often notices half-repaired vehicles waiting for a missed part or sublet vendor to arrive. During his presentation, he stressed the importance of ensuring that everything needed to repair the car is organized in advance.
“Just because you have an estimate and a technician doesn’t mean that the car is ready to be repaired,” he said. “There are little things you are going to need as you work on that vehicle, and if you don’t have those things, your technicians are just staying busy working on cars but not being productive---completing repairs and getting them out the door.”
His advice: “Don’t put a vehicle in production until you are 100 percent sure that it’s ready to be repaired and will go through the shop without any stoppage.”
Shoemaker said that careful production planning can reduce the “chaos” of collision repair. Experience has shown that it can also help with productivity and reduce cycle time, improve touch time and ultimately improve overall customer service and a shop’s key performance indicators (KPIs).
Shoemaker shared five key steps to repair production planning:
1) Systematic damage appraisal inspection – itemizing all operations necessary to repair the vehicle
The first step is to review the vehicle using a damage appraisal as a guide and disassemble the car to ensure all of the damage is identified. As you disassemble the vehicle, systematically list the parts that will be needed for any identified repairs.
“A certified tech and damage appraiser should identify every single step that’s involved in repairing that vehicle on day one,” said Shoemaker.
2) Focus on all parts, materials and sublet identified on the damage appraisal
Next, Shoemaker said to determine the type of part to be used, whether it’s OEM, aftermarket or recycled.
“Not only should you have the parts necessary, but you should also have everything related to replacing that part,” he advised.
This includes accessory items such as fasteners; decals, emblems and labels; seam sealers, corrosion protection and sound pads; and pinstripes. He said to pay close attention to validating internal/external repairs such as glasswork, key coding, mechanical repairs and framework.
Shoemaker encouraged attendees to follow OEM repair procedures every time to learn exactly what is going to be needed for the repair and to reference Standard Operating Procedures (SOPs) from companies such as 3M. Another option is asking the dealer selling the parts to obtain the OEM procedure.
“If you order a roof panel from somebody, ask them to send the repair procedures with it,” he said.
3) Validate available reference materials that were used to capture repair process operations
During this stage, Shoemaker said it’s critical to capture all operations using P-Pages, information from ALLDATA, the SCRS Guide to Complete Repair Planning, the vehicle manufacturer repair specifications and/or refinish procedures.
“Make sure you have them attached to your damage appraisal,” Shoemaker recommended. “They should be systematically documented and work hand-in-hand so there are no questions down the line.” He said this outlines to everyone involved exactly what steps have to be taken for the repair and the process that is going to be used. The information can also be helpful in the event of litigation.
4) Review damage appraisal with paint team leader to validate refinish requirements
The reason this is important, according to Shoemaker, is that team members often have differing opinions about what needs to be painted and how it should be accomplished. This may be related to paint code, validating blend areas and verifying the refinish process—whether it’s single stage, base/clear, tri-stage, four-stage or matte finish. By having everyone involved from the onset, Shoemaker said, you’re closing the loop and ensuring all employees have a voice at the beginning of the process.
“Using this method, you’re able to confirm everything that has to happen on that repair the first day of the repair,” he said. “This allows everything to move steadily through the shop without stopping.”
5) Validate with the production coordinator, parts specialist and lead body technician
After the repair has been validated, Shoemaker said it’s time to develop a repair plan for the management system.
“Having an accurate repair plan will help you create timelines for each step, monitor the progression and allow all involved to understand what needs to be done,” he said. “Having a solid repair production plan will help keep your customers properly informed and is the first step in having them completely satisfied when the job is complete.”


Stacey Phillips Ronak